
VALLEY OF FLOWERS TREK ---
STEP INTO THE LEGENDARY PARADISE

Trek Cost :
₹ 10,000 + 5% GST (Rishikesh to Rishikesh)
ABOUT THIS TREK
Grade : Easy
Region : Uttaraakhand
Altitude : 4389 m
Trek Distance : 60 Km
Trek Days : 6 Days
Best Season : June to September
Nearest Railway : Dehradun
Nearest Airport : Jolly Grant
The Valley of Flowers depicts ‘Phoolon Ki Ghati’ in hindi is the perfect phrase for the valley. The Valley of Flowers national park is situated in Chamoli district of Uttarakhand is
known for a meadow of endemic alpine variety flowers and flora. This is India’s most popular trek that many foreigners want to trek. The reason behind the popularity is it is the oldest
known trek. In the year 1980 Indian Government declares this as a national park and later on 2002 it was recognised as UNESCO World Heritage Site. That makes this trek more popular and
famous around the world.
The history behind this trail, three british mountaineers Frank Smythe, Eric Shipton and Romilly Holdsworth lost their way while descending from the Mt. Kamet expedition. Innstead of
taking the route to Mana Village, they descend mistakenly by Bhyundar Khal(Pass), and reach this heavenly valley hence the myth of heaven touched reality, the outer world get to know
about this heaven.
Now from the Hindu Mythology this reffers the Nandan Kanan, the garden of Lord Indra. The glacial stream carved this valley and the river name is Pushpawati flowing east west direction.
The mythological story says that Pandavas saw there flowers are floting on this river water so that the name is given.
The valley is around 8 kms long and 2 kms wide, surrounds by high ridge line. In the Monsoon this west himalayan region blooms with alpine vegitation and lots of wild flowers. From
the month of June to October the valley remains with variety of flora. The valley turns into pink,white,blue,violet,crimson with lots and lots of flowers. You cann’t remember all
the names of the flowers, Anemone, Balsam, Angelica, Bell flower, Blue poppy, wait…. Corbra lily, Marsh mariegold, brich and famous Brahma Kamal. These all types of colorful flowers
with green velvet valley will surely feel you are at heaven. The flowing river with misty clouds make left you a hypnotical view that you cann’t turn your eyes. There are almost
500 types of flowers can be found in the valley and some of with medicinal value. The beauty of a valley can be this much you cann’t be believed untill you visit there.
Since this is a National Park and World Heritage site do not disturb the flora, any type of flower picking is offensible, just enjoy the beauty don’t spoil it. That is why any kind of
animal grazing also not allowed. The season of this trek is in rainy season, so keep rain jackets/poncho and rain cover of rucksack. Water proof trekking shoes are must. There is
a list of trek gears to carry on this page you can visit for further details.
The trail is mostly gradual 14kms walk to Ghangaria along with the Pushpawati river. The route is well defined and paved. This is easy to moderate graded trek, theb difficulty level
discussed in details in the How difficult is this trek section, you can check it out. You will find small tea stalls on the trails. Visit VOF from Ghangaria and next day to the Hemkund
Sahib, a moderate climb. Then we will back via same route. You cann’t expect luxurious stay on this trek, there is no camping, stay at Ghangaria on basic Homestays/Lodges. The Hemkund
Sahib gives a sacred touch on this GOD’S valley, will refreshen your mind and soul with spirituality.
Gallery


WHY YOU SHOULD DO THIS TREK
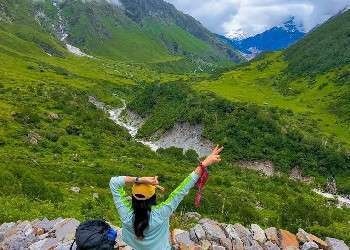
The main Valley
What else do you want after visiting the best valley in the Himalayas. The heavenly valley you leave you spell bound with the misty cloudy views of the valley. The varient colors of
the flowers of the valley will touched your soul, you question yourself are these views real or you are having a dream to be in heaven. The valley, flowers, rivers, clouds, snow
mountains, long ridges is just spectacular views of the Himalayas.
Spirituality
The Hemkund Sahib gives a touch of holy and sacred to this trek. Visit the spiritual place and find your own peace of mind. Refreshen your soul and mind with the fresh himalayan
wind and forget about all the daily life.
ITINERARY
DAY 1 | Arrive Govindghat, Drive
Drive from Haridwar/Rishikesh to Govindghat, 291/267 kms, 10/11 hrs journey. The transportation charge is included in the cost. Overnight stay in Lodge/Homestay.
Meals: evening tea & snacks, dinner.
Stay: Homestay
Altitude : 1828m/ 6500 ft
Meals: evening tea & snacks, dinner.
Stay: Homestay
Altitude : 1828m/ 6500 ft
DAY 2 | Govindghat to Ghangaria trek
Start trek after breakfast form Govindghat to Ghangaria, 14 kms trek, 7/8 hours. Have your packed lunch on the way and reach Ghangaria by evening. Evening tea and snacks followed
by dinner. Rest and accomodation at Lodge/Homestay.
Meals: tea & breakfast, lunch, evening tea & snacks, dinner.
Stay: Homestay
Altitude : 2290m/9800ft
Meals: tea & breakfast, lunch, evening tea & snacks, dinner.
Stay: Homestay
Altitude : 2290m/9800ft
DAY 3 | Ghangaria to Valley of flowers and Back
Today is the excursion day to the main attraction. We will visit the GOD’s valley, spent few time there and get back to Ghangaria. 8 kms, 6/7 Hours. Evening tea and snacks after
getting back at Homestay followed by dinner. Overnight stay at Homestay/Lodge.
Meals: tea & breakfast, lunch, evening tea & snacks, dinner.
Stay: Homestay
Altitude : 3500m / 11500ft
Meals: tea & breakfast, lunch, evening tea & snacks, dinner.
Stay: Homestay
Altitude : 3500m / 11500ft
DAY 4 | Ghangaria to Hemkund Sahib trek and Back
Another excursion day to the holy place Hemkund Sahib. Moderate class uphill trek 6 kms. 12 kms in total, 7/8 hrs. Again back to the same place Ghangaria with same meals and Homestay.
Meals: tea & breakfast, lunch, evening tea & snacks, dinner.
Stay: Homestay
Altitude : 4300m/14100ft
Meals: tea & breakfast, lunch, evening tea & snacks, dinner.
Stay: Homestay
Altitude : 4300m/14100ft
DAY 5 | Trek back to the Govindghat
Leave Ghangaria after breakfast and descend down to Govindghat, 14 kms, 6/7 hrs. Hot lunch at Govindghat homestay/Lodge. Evening refreshment followed by dinner. Overnight stay at Lodge/homestay.
Meals: tea & breakfast, lunch, evening tea & snacks, dinner.
Stay: Homestay
Altitude : 1828m/ 6500 ft
Meals: tea & breakfast, lunch, evening tea & snacks, dinner.
Stay: Homestay
Altitude : 1828m/ 6500 ft
DAY 6 | Drive back to Rishikesh/Haridwar
Last day of your trip, after breakfast leave for Haridwar/Rishikesh. Your trip ends here. The transportation charge is include in the cost.
Meals: tea & breakfast
Stay: No
Meals: tea & breakfast
Stay: No
HOW TO REACH THE BASE VILLAGE GOVINDGHAT
The village Govindghat is well connected by road to Joshimath. Almost everyone knows hown to reach Joshimath from Haridwar/Rishikesh. Get overnight train/Bus to Rishikesh or to
Haridwar then drive to Rishkesh. Nearest airport is Jolly Grant Airport, Dehradun. Drive to Rishikesh, 20 kms if you are arriving by flight.
From Rishikesh you can get govt bus for Badrinath at 4 AM and get off to Govindghat. Another bus is there leaves Rishikesh at 4:30 AM for Pandukeshwar, you can take that bus also.
The bus fare will around 400. If you miss the bus for Badrinath, don’t worry get the bus for Joshimath leaves Rishikesh at 6 AM, and get a cab for Govindghat it is 20 kms only.
The shared cab form Badrinath taxi stand charges 50 only for Govindghat. If you want to choose this journey, make sure you reach Rishikesh early in the morning to get the bus. Or you
can arrive Rishkesh one day early and stay near the bus stand for night. Next day you can easily get the bus for Badrinath/Joshimath.
Otherwise the best hassle free comfortable journey is by cab, you can book a cab of 5/6 seater if there is a 5/6 trekkers in the team. It will cost you 8000-10000.
FINEST TIME TO EXPERIENCE
The valley is all about the flowers. And there is only one season when the flowers blooms. So, the season starts from the Mid June and last till September. The trek is not same on
every month. As the rain comes the valley comes more alive with the rain fall. So after the peak rainfall in the August, you can visit in september for best views.
In the month of July this trek is full of lush green meadow, spur and the trails also. You will find a bit snow as it is in quite high altitude until the rains wash it off. Till
mid-July there is few less amount of flowers, after mid-july the rain comes and the valley gets full of flowers. The valley turely starts blooming and shoed up with ots real beauty
after mid-july. The Asteraceae family flowers have 62 species variety found on this valley.
In the month of August, monsoon clouds stops the long range views and washed off the valley. Maximum variety of flowers blooms in this season with the fresh rainfall. The whole
valley experience drizzles on this month. Crowd gets lower on this time.
In the month of September, the flowers starts disappearing. After the mid September very few flowers are left. But sepptember brings another kind of view with green ridge line with
clear snow mountain views in the background. This time another crowd rush increases in the valley to the Hemkund Sahib. Lots of pilgrim folks visits this time the Gurudwara at
Hemkund Sahib.
HOW DIFFICULT IS THIS TREK
The honest words from our experienced trek team of Adventure Now is the Valley of Flowers is not much difficult one, but a easy to moderate class. And it graded moderate for just
only for the long distance walk. Mostly the trekking trails are easy category with gentle slopes. May be this trail is way longer than other easy treks but the gradient of steepness
is quite easy till Bhuydhar Village, followed by a one hour moderate steep uphill to reach Ghangaria. So, that it is strongly recommend for beginners.
There is another one steep uphill to the Hemkund Sahib, might be tiring climb, suggested to ascent slowly. As being a Homastay trek it is very convenient to the family, kids and
beginners. However, the beginners and kids keep in mind that you need to bring a good physical fitness in order to walk long route 7/8 hours a day. Parents should give a physical
training to their child before you bring your kid. If your child is not confident enough to carry their own backpack you can opt for baggage offload, this also aplies for the beginners.
Overall this is a doable trek for the beginners and Childrens, so mostly easy trek.
TREK INCLUSIONS
- Stay included from Day 1 to Day 5. Homestays are included on sharing basis.
- All meals after reporting at the base village Govindghat are included.
- All camping gears are included.
- A medical kit, oxygen cylinder and necessary items to counter worst case scenario.
- Qualified Trek Leader, well trained and experienced Guide, Co-guide(if necessary) are included.
- All the forest permission and entry permit are included.
- Transportation from Rishikesh to Govindghat vice versa.
TREK EXCLUSIONS
- Any meals on road journeys.
- Personal hiking gears.
- Separate room for couples (charges apply if booked prior).
- Porter or mules for carrying personal luggeages.
- Any personal expenses on shops/dhabas.
- Any unscheduled stay/departure out of the itinerary due to unforeseen weather conditions, govt ban, natural calamities, medical emergencies.
WHAT TO CARRY ON VALLEY OF FLOWERS TREK
The beginner friendly Valley Of Flowers trek doesn’t demand a lot from you. But the first thing you need to carry on every trek is a bit fitness and endurance. So before attempting
a trek always do some Cardio and other endurance exercises to build your exercise. And oviously few hiking gears like Rucksack, Waterproof Trekking shoes, warm layers of Jackets,
Thermal Inners, Woolen and sun caps, Sunscreen(SPF 40) and toileteries, good quality waterbottle, multiple pair of socks, lighyt wieght rain poncho or jacket, warm gloves, a day pack
Headlamps with extra cells, sunglasses etc. At last if you have any queries or its confusing what to carry for you, please feel free to contact Adventure Now. Don’t overwaight your
backpack, otherwise trek will seem to be very difficult.
IS THIS TREK SAFE FOR CHILDERN?
The valley of Flowers trek is well known trek and its trails are wide and paved. So, anyone can hardly lost. The risk free wide trails make easy to ascent. It is definately doable
for your child above 14 years of age. Go through a regular exercise sesson with your child at least for 20 days before coming on this trek. This will make your child fit enough to
finish this trek succesfully. The altitude gain and steepness of Hemkund Sahib might be a challenge for your kid, but trek to Hemkund is a excursion day your kid doesn’t need to carry
the whole backpack but a daypack only. Our trek team will be there on the whole trip to support your childs. A sporty kid with good fitness level can do this trek.
Frequently Asked Questions
Acclimatisation is the most important part of high altitude trek. Acclimatisation is the process where your body start getting cope up with mountain weather & atmosphere that is
different from your hometown. This change of environment may affect your normal performance in that environmental conditions. So you need to be well acclimatise to safely do the
trek. Not every time depend on the high altitude medicines to avoid AMS, go for natural acclimatisation. Otherwise your body will depend permanently on the medicines whenever you
go to the high altitude. The natural acclimatisation is more powerful than medicines. We need to accept the himalayas as it is challenging. It is not that himalayas are unbeatable,
but requires to follow rules and systematic approch.
How do human body actually acclimatise to the high altitude? In the high altitude the air pressure gets lower so the density. That is why the molecules spreads out in more space and
get apart from each other. This affects lower oxygen consume per breath. Our body reacts with that change and starts to take more breath that is hypoxia. We often called it
breathlessness in laymen term. Then body try to take more breath to reduce the level of carbon dioxide in our blood. This results increase pH of blood, making our blood more alkaline
and body starts urinate more for exerting of bicarbonates.
On the other side the body starts to produce more hemoglobin count which are the oxygen carriers in our blood. This thickens our bloods and now our heart need to pump more to throw
the blood in the distant organs hence the blood pressure gets higher. This indicates slight high pressure and pulse rate is normal in high altitude areas.
There are three golden rules to acclimatisation in the field of mountaineering is –
1. Climb high sleep low
2. Ascend slowly, take your time. And do not over exert.
3. Hydrate & hydrate yourself more & more.
Our expert justified few ways to acclimatise naturally are discussed below-
At first check your itinerary. Trekking is not a game in hurry. You need time to complete. It is not anything you achieve but enjoyed. This is a sport that is away from any competition. Any trek should not be judge by time & distance. Do not over exert yourself, don’t go beyond your limits. Fix your itinerary comfortably. Do not try to cover more distance and altitude gain in one day to minimize the trekking days and cost. On the very initial days approach slowly even you are fit enough to trek faster. Take more time to gain altitude. This allows your body enough time to adjust with the atmosphere. Always bring a well hydrated body in the Himalayas and keep hydrated yourself on the trek days. Drink 3-4 liters of water every day on trek, and consume enough tea, soup, dal and other liquid includes in your meals. Do not consume any type of alcohol drinks 2/3 days before you start the trek, and also don’t on the trek. We do not allow any trekker to consume alcohol on the trek, if found he/she will be sent back then and there. We do not also advise to consume any hard drinks, too much coffee is also not good. ORS and other energy/glucose tablets are best on the trek. After arriving on trek base, trekkers may feel cold weather. But do not cover yourself fully with all of the woolen cap, muffler, neck warmer and all. Let your body to sense the atmosphere change with the sense organs. It will help in natural acclimatisation. Allow your skin to feel the cold. your ears to sense the pressure change. Keep that open while gaining altitude, unless there is a blizzard or bad weather condition. Don’t be a show off man, don’t show unnecessary bravery. Keep your body protect from cold weather. Protect your body from cold wind, cover your head at night & bad weather, cover your neck, tonsils and body tip like fingers, toes etc. Get proper sleep at night. It doesn’t mean that you should sleep at day time or in the afternoon as soon as you reach the campsite. Sleeping is important on every trek to get refresh and rest for next day trek. If you find difficulty in sleep bring immediate notice to the trek leader or guide. As you reach the trek base try to keep yourself dry, do not loose the body heat. Do not skip your soup in the evening. The garlic soup & other helps in blood circulation, keeps your body warm. You remain active on the high altitude. After reaching campsite everybody gets tired, this is normal. But do not get into your sleeping bag & take a nap. This will not help you to get acclimatise. Have some rest for a while, then explore the nearby places, go for the acclimatisation walk. You need to follow the golden rule ‘climb high sleep low’. Climb a bit higher in acclimatisation walk and get back to the campsite. You can indulge yourself in games, or can go for photography. Eat proper meals throughout the day, but lite. Not so much spicy foods, consume easy to digest foods more.
Trekking is a adventure sports, you need to bring a sportsman sprit and fitness on any trek. There is a big worry in many trekkers that how much they need to be fit for a trek.
The himalayas are full of steep uphill, rough terrain, walking in the snow all these can be very challenging for trekkers specially for beginners. We will discuss here how to get fit
for any trek with a complete training guide.
Trek to uphill mountain is not in our daily routine so it is simple that we will find it tough to climb uphill. And with a backpack it seems very challenging. But only a month of
regular exercise can make you fit for the trek. Cardio exercise is the best for pre trek exercise. Do some cardio exercise like jogging, swimming, cycling, jumping jacks etc will help
you to build your endurance. Don’t forget to do some leg exercise like squats, lunges, stair climbing etc to build stamina of your legs.
Now we made a routine exercise for you –
1. Cardiovascular endurance : On your trek you will constantly gaining altitude with your backpack in low oxygen atmosphere. Your heart will do more effort in this condition. So you need to go through cardio exercise at least for one month regularly to counter this constant uphill climb comfortably, infact you will find it bit easier. Jogging for 4 kms in 30 minutes is your first target for this. Start with slower jog and continue to fill the target.
2. Leg exercise : After one week of jogging add some leg exercise like squats and lunges to your routine. This exercises will build stamina of your leg that will help you on steep uphill climb. Start with 10 squats and 10 lunges of 2 set in first week. Then increase to 3 sets. Try to fulfil your target to do 3 sets of 15 each before the trek.
3. Strengthening the core : For strengthening your core body plank and hip raise are best. Do plank for 20 seconds for first three days and then start increasing by 10 seconds till 60.
Along with that do 10 hip raises 2 sets, and increase for 3 sets of 15 each. That should be the goal. So, get ready for your next adventure, make yourself fit enough to do the adventure activities.
There are three level of fitness we categorise :
Level 1 : It is the minimal fitness with that you just able to finish the trek. You struggle a bit, but not too much to do the challenging section. We find most of the trekkers with this much of fitness.
Level 2 : This is one level up fitness you bring on the trek, that you find the trek not very difficult or moderate but easy. And you can carry your own backpack easily throughout the trek. You don’t feel exhausted at the end of every day trek. You are find yourself still not tired and active after reaching the destination. You enjoy the other activity and enjoy exploring the nearby or involving yourself in some game.
Level 3 : This is the fitness we admire most & the ultimate mountaineer like fitness. The trekkers with this fitness finds trek easy for them and they are still very active after the whole day trek even with their rucksack. Not only that these people are fit enough to tolerate bad weather conditions, contribute in some work like tent pitching & kitchen activity, bringing water from nearby water source. Give a hand if other trekkers are in trouble or in some rescue operation.
Rucksack is a most important equipment on every trek & packing your rucksack is a important task for your trek. On a typical trek you need to carry your own rucksack, and if your
rucksack is not comfortable to carry you will eventually start hating your backpack and also the trek. A rucksack need to be perfectly pack that it should be comfortable to carry
on your back. It should not hurt you anyhow. The mordern day designed rucksacks are very light weight and have many chambers to pack seprately. A good quality rucksack have well
paded for comfortable carrying in waist and shoulder. If you are planning to buy a rucksack, please keep the things in your mind and don’t forget to check the strength of rucksack and
other straps.
Before you pack your rucksack go through our basic rule. This will help you to pack easily as a beginner. You just can not do every day packing and unpacking on multiple day of trek. Imagine how irritable and time consuming that will be. The A B C D E rule to pack your rucksack—
A – Accessibility = While packing your rucksack pack in such way that every thing are easily accissible for you. Use the different parts to achieve different things easily. For an example use different chambers for toileteries, different for your dry fruits and snacks, different for clothes, different for small items like gloves, socks, woolen caps etc. Keep the items at top or side pockets that you may need on the way like rain wears, sunglass, sunscreen etc.
B – Balance = Your bag need to be packed in such way that it can stand straight when you leave your backpack alone on a flat surface. The more your backpack is balanced the less it will hurt your shoulder. The weight distribution on both shoulder should be equal in order to comfortable carry.
C – Compression & Compartments = While packing your backpack compress all the cloths and the things that can be compresed. It will give you more space inside your rucksack. But remember don’t do more compress or less, do as much as it needed. Compress till it gives you more space to adjust other things. Now use more compartments or make more compartments by using different colored plastic bags, like for socks and underwear use red color plastic bags, for inner and thermal clother use yellow bag, for woolen cap & gloves use green one. It will not only give you another layer of waterproofing but also help you recognise all the different things. This will also help you to find your stuffs quickly.
D – Dry = Always keep your backpack dry from outside and inside also. Use rain cover from outside. And from inside all of your stuffs should be kept dry, otherwaise it will be more heavier than usual. Wet rucksack is not only heavier but also prone to damage, not good for rucksack maintenance. Use rain cover to protect from get wet.
E – Environment = Make a list of your stuffs that need to be packed inside the rucksack according to the environment of the trek you are going. Keep in mind the weather in that perticular month you choose to trek. Pack your backpack with stuffs you need in that weather conditions.
EXPERT’S ADVISE:
-> Always keep the heavy things in the middle of the rucksack and closer to your back.
-> The medium weight things should be kept in the lower compartments & liteweight items should be kept in top section of your rucksack.
-> Use plastic layer from inside to keep the stuffs dry.
-> Don’t forget to put rain cover from outside in rain and snow.
-> Adjust the shoulder straps to balance weight on both shoulder. Put the waist starps also to get better support and balance.
-> You can use you rucksack as a pillow inside the tent, or can rest your leg on rucksack.
Lots of trekkers are very worried about their accomodation on trek days. Wheather it gonna be comfortable or not, safe or not. Here is the answer. We have the good quality tents and
sleeping bags for high altitude treks. Our mattress are very soft and thick to provide a comfortable sleep at night. But you should keep in mind that trekking in wilderness in himalayas
are not any four or five star category. This is an adventure trip, if we provide a homely/hotel feeling on your trek, then there will be no adventure left for you. But obviously
we will definitely provide a safe and cozy tent for your stay. Our tents are tested in bad weather conditions also. Sleeping bags are very warm to spend nights with a good sleep.
And at the trek bases we arrange the best homestay available at the village. Homestays are sanitised and clean from inside. Toilets are well maintained and hygiene.
We go to the each and every trek base we organise and choose our guides on the basis of their experience, behaviour, past record, knowledge, abilities and good personality. They
knows all about the routes and reacue & evacuation plans. They know how to handle in bad weather conditions. Our guides are well trained for work in the mountains, knows about
the camping gears. They have years of experience in safety methods and protocols on the trek. Our guides are very happy to help and eager to serve you better. They always maintain
health and hygiene. They are very friendly and make the more enjoyable for you.